Resurrecting ancient CD-ROMs with VirtualBox and Windows Virtual PC

I have a stack of old CD-ROMs from projects ranging from 1995-2003. I wanted to save a few of them to add to a portfolio of projects, before the projects were lost forever. It’s ironic – back in the olden days of multimedia, we burned fancy new CD-ROMs that were sold as “100 year archive medium” – costing $30 or more per disk back then, and we figured it was money well spent. Now, just 20 years later, most of those archival “green media” disks are completely unreadable, having degraded already. Thankfully, I have several projects that were commercially distributed, meaning I have actual pressed CD-ROMs rather than DIY burned disks. These disks read just fine – and should for decades to come.

But, none of the computers I use even have an optical drive. Back then, we figured the format would live forever – I mean, 650 MEGABYTES? That’s a LOT of data! We’ll always want to be able to read/write that kind of stuff. Now, GarageBand on my iPad takes more storage. So, while Evan’s now-ancient Macbook still runs, I decided to try to resurrect the CD-ROMs as screenshots or recordings.

Step 1. Convert the CD-ROM to a disk image. I used the nearly-decade-old Macbook just for the optical drive, running Disk Utility to create the .cdr disk image from each of the disks I wanted to save.

Step 2. Copy the disk images to a computer with enough horsepower to run VirtualBox. In my case, my 4-year-old MacBook Air. Not a fast computer, but it has enough horsepower to run VirtualBox if needed.

Step 3. Download the official Virtual PC Windows XP appliance from Microsoft.1 Microsoft offers legitimate virtual disk images of several flavours of Windows to allow for easy testing of Internet Explorer. But, they’re full copies of Windows, so you can also do things like run CD-ROMs…

Step 4. Set up a new virtual computer in VirtualBox. Import the appliance file downloaded in Step 3, and it will set up a new virtualized Windows XP system to run.

Step 5. Start it. I set mine to use 640×480 resolution so the CD-ROMs would play full-screen.

Step 6. Attach the .cdi disk image of the CD-ROM to the (virtual) optical drive. If the CD-ROM has auto start, it kicks in right away. If not, right-click on Start menu and Explore. Launch the installer or application on the CD-ROM.

Step 7. Revel at how horribly most CD-ROM interfaces look in 2015. Take screenshots. Use Camtasia etc. to record demos.

Step 8. Repeat as needed, with different CD-ROM disk images.

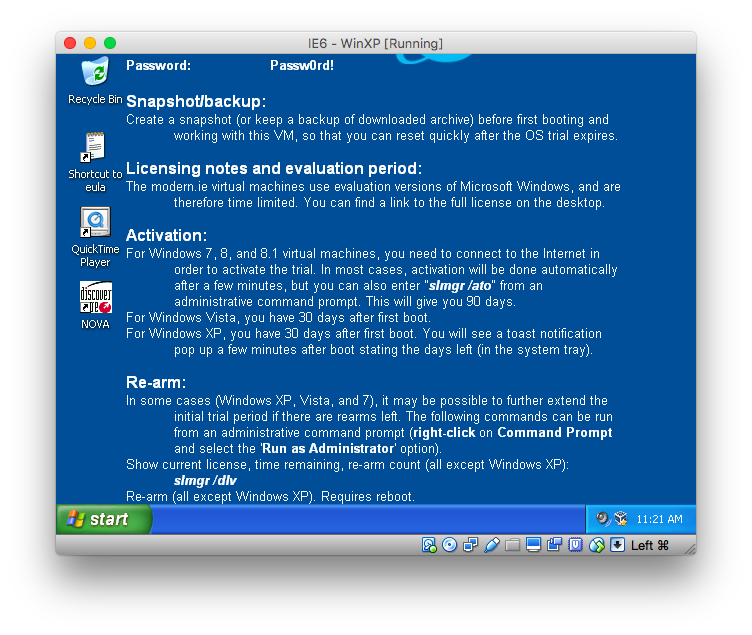
Some screenshots of the process:

Screen Shot 2015-12-28 at 12.20.32 PM
Setting up the VirtualBox instance, after importing the appliance image from Microsoft.
Screen Shot 2015-12-28 at 12.21.13 PM
Windows desktop, with instructions provided by Microsoft for how to renew the license on the demo VM if needed.
Screen Shot 2015-12-28 at 12.21.38 PM
It’s a full version of Windows XP – Start menu and everything. So… install some CD-ROM retro goodness…
Screen Shot 2015-12-28 at 12.22.09 PM
Running the CD-ROM installer from the Windows Explore interface.
Screen Shot 2015-12-28 at 12.22.56 PM
Behold! Multimedia awesomeness from the year 2000!
  1. It’s the same VirtualPC brand – Microsoft bought it a few years ago []

blocking distributed botnet attacks against WordPress (multisite)

I checked the Activity Monitor page1 for UCalgaryBlogs this morning, and noticed that there had been several thousand attempts by people (or “people”) to login using the usernames “admin” (the default WordPress admin account, which isn’t what’s used on UCalgaryBlogs) and “siteadmin” (which is the username for our server – scripts must have sniffed it from blog posts on the main site…)

Curious. I’d installed the fantastic Limit Login Attempts plugin to prevent people from brute-forcing logins, but that plugin only kicks in if the same IP address hits the login form repeatedly. This botnet attack was different – each request had a different IP address, and a different user-agent string. So Limit Login Attempts wasn’t blocking them, and my htaccess user-agent filter wasn’t catching them because they were either valid user-agents, or close enough to get through.

Looks like they were using a dictionary attack, starting at aardvark and working through zyzzyva. Thankfully, I don’t use actual words for passwords, but I decided to change the password to use something stronger than I’d been using. Thanks to 1Password for making that trivial. I don’t actually know the password now. And it has nothing to do with any word found in a dictionary (except that it might use some of the same ascii characters).

Some quick googling for “wordpress distributed botnet protect” turned up a new (to me) plugin called Botnet Attack Blocker. Sounds interesting. It was written in response to some recent distributed botnet attacks, and handles logins spread across different IP addresses.

Installed. Activated on the main blog site. And the attack stopped instantly. I can still login from the campus network even if the plugin kicks in and blocks admin logins. But the botnets can’t continue to brute-force passwords.

Screen Shot 2013 10 16 at 11 48 40 AM

So, now it’s been over 3 hours since activating the plugin. And the attack has (for now) been blocked.

Lessons learned:

  1. Do not (ever) use actual words in passwords. Ever. Generate something secure, and use a tool to store/retrieve them.
  2. Keep up to date on the security environment for the tools – including WordPress. I hadn’t been aware of a distributed botnet attack problem recently, nor of a plugin developed specifically to block that.
  3. Install Limit Login Attempts to stop single-IP-address attacks.
  4. Install Botnet Attack Blocker to stop distributed botnet attacks.
  1. using an old version of the WPMUDev Blog Activity plugin []

how to repair all tables in all databases on a mysql server

This comes in handy, and I have to google it every time I need it12. So, here’s a copy for reference later…

mysqlcheck --repair --use-frm --all-databases

Run it as root, with MySQL running. It’ll repair every table in every database. Give it time to chew for awhile. It spews out the status of every table as it works. Here’s what it found with my Fever˚ database tables (which now work just fine):

dnorman_fever.fever__config
warning  : Number of rows changed from 0 to 1
status   : OK
dnorman_fever.fever_favicons
warning  : Number of rows changed from 0 to 408
status   : OK
dnorman_fever.fever_feeds
warning  : Number of rows changed from 0 to 240
status   : OK
dnorman_fever.fever_feeds_groups
warning  : Number of rows changed from 0 to 305
status   : OK
dnorman_fever.fever_groups
warning  : Number of rows changed from 0 to 17
status   : OK
dnorman_fever.fever_items
warning  : Number of rows changed from 0 to 13660
status   : OK
dnorman_fever.fever_links
warning  : Number of rows changed from 0 to 46208
status   : OK

Better.

Looks like it doesn’t like INNODB tables, throwing this:

note     : The storage engine for the table doesn't support repair

So, if you’re using MyISAM tables, this should do the trick. Not sure how to fix the INNODB tables, or if they even need fixing…

  1. usually coming up with the top-voted answer for a question posted to stackoverflow.com []
  2. actually, I use DuckDuckGo, so I get the tip inline in the search results… []

syncing Desktop across multiple computers

I treat my Desktop as “stuff I’m working on right now” and file things away into project folders after I’m done actually working on them. I also use 3 different computers, and a couple of iOS devices. How to sync this active-work area across all? This would work with any other file sync tool1.

It’s an easy trick, based on one I found on Lifehacker2. It’s also not necessary – it’s trivial to just leave the active-work files in the Dropbox directory, but then you have to go digging every. single. time…3

First, on one computer, create a Desktop folder in your Dropbox directory, at ~/Dropbox/Desktop (then wait for it to sync to Dropbox).

Then, in Terminal, run this on all computers you want to sync the desktop:

sudo mv ~/Desktop ~/Desktop.bak
sudo ln -s ~/Dropbox/Desktop/ ~/Desktop

This will move the “real” Desktop directory out of the way (but just renames it so Finder won’t use it – all of the files are still safe) and creates a symbolic link from the ~/Dropbox/Desktop directory to the place that Finder looks, at ~/Desktop.

Then, log out (don’t save state – Finder has to relaunch fresh) and log back in again. Move any critical/active files from ~/Desktop.bak/ back onto the Desktop. Sync. Magic.

Not sure how this will work over time – I’m sure the Finder-specific invisible files will act up a bit, storing strange positions etc… for icons on the shared Desktop… Might also get extra funky if mixing platforms – I have no idea what would happen if Windows variants were thrown into the mix. Should be possible to share a Desktop across Mac/Win/etc… though.

  1. I recently gave up on OwnCloud for a bit because it was just too funky to trust 100% with my active working files, because it gets confused with browser-based wifi authentication and self destructs when it encounters this. so, I’m on Dropbox (again) for now. []
  2. but I had to modify it ever so slightly. The Lifehacker recipe wanted to sync the entire Dropbox directory to the Desktop. That’s just stupid. []
  3. and, yeah, you can just add that folder to the sidebar in Finder, but, again, clicking every time… []

debugging the text editor in sharepoint

tl dr; run IE in 32-bit mode. Seriously. I know. That’s what I said, too.

I’ve been using Sharepoint 200712 with my group, to share information about groups and projects on campus. It’s been working, but we just started using the wiki tool3, and my inability to make the visual text editor turn on became really troublesome. I’d never been able to get the visual editor to show up. I looked in settings – the visual editor in Sharepoint 2007 is implemented as an ActiveX control4 so I made sure I was running Internet Explorer5 (IE9 on Win7). I made sure that I had ActiveX enabled, and that security settings would let it run. All set. Still, no visual editor. WTF?

Lots of pointless googling and duckduckgoing. Some possible leads. Nothing worked.

I tried re-installing Sharepoint tools. No joy.

I tried rebooting. I tried poking around in the Sharepoint site settings and my user preferences. For hours. I looked through the IE prefs again. Still, no joy.

Then, it hit me. I’m running Windows 7 in 64-bit67. Running Internet Explorer 9 in 64-bit8. Maybe the ActiveX isn’t available in a 64-bit version? Browser plugins on MacOSX had a similar problem – 32-bit plugins wouldn’t run in 64-bit Safari, so you could relaunch the browser in 32-bit mode to use those. So I quit IE, and launch the 32-bit version.

And the visual text editor shows up. FML.

Microsoft, in its infinite wisdom, selected a technology for a core component of their enterprise collaboration website software that is only compatible with 32-bit versions of the browser they produce, and no other browsers on any other platform. And, when it fails to load the ActiveX control for the text editor, it does so silently, without even a warning like “hey – you’re missing out on some key functionality, buddy.” It’s just… gone. Unless you run IE on Windows in 32-bit mode. THEN, you get a crappy visual editor with minimal functionality, generating insanely ugly HTML that makes anyone who knows HTML want to drown kittens. Awesome.

  1. yeah. I know. not a fan of Sharepoint either. but it currently pays my mortgage, so I suck it up and use it. []
  2. also, yes, we’re running software that’s 5 years old. it’s kind of a pattern we have on campus. we’re working to update it, hopefully soon, but yeah… our version of Blackboard is about 6 years old, too… []
  3. the worst wiki tool I’ve ever used. ever. []
  4. again, yeah. I know. let’s build a website that relies on technology that is only implemented in a single browser by a single vendor. wait. it gets better… []
  5. once again. yeah. I know. IE9 is better than previous incarnations, but it’s not my first choice. again, with the using-it-pays-my-mortgage stuff, so I suck it up and use it []
  6. seriously. again with this? it’s basically an appliance for Outlook, Sharepoint and Dynamics. []
  7. if you think Outlook or Sharepoint are painful to use, try Dynamics. Yikes… []
  8. because why would I run in 32-bit mode on a 64-bit OS? []

protecting wp-login.php

I noticed a rather severe spike in CPU usage on my Mediatemple server, and dug in to see what was causing it. For an hour, someone was hammering the login form for my blog, accounting for 98% of all CPU usage for my account during the “attack”. That’s not OK (I have lots of CPU/bandwidth left, but it’s silly to leave a login form exposed to some kind of sustained script-kiddie “attack”).

Guess where the login form “attacks” are… I’m still only using 15% of my allotted CPU time overall, but wanted to stop this before it grew into something else.

I modified my .htaccess file to block all access to the wp-login.php file, unless you are referred to it by a super-top-secret page somewhere on the internet. I combined this tip with a bit adapted from this tip (which is something I already use to protect the University’s Feed2JS install from stupid casino spammers).

Anyway, here’s the trick to locking down your WordPress login form, without having to mess things up too badly.

# protect wp-login.php
<Files wp-login.php>
    Order deny,allow
    RewriteEngine  on
    RewriteCond %{HTTP_REFERER} !^http://secret-server.com/secret-login-page.html$ [NC]
    RewriteRule .* - [F]
</Files>

You’ll want to change the bit that says “secret-server.com/secret-login-page.html” with a URL that holds a file you’ve created. That file will contain a hyperlink to the wp-login.php file on your blog. All attempts to access the login form will be refused, unless someone has followed the link from your secret login page first. Security through obscurity, sure. But the stupid script kiddies will be blocked, and it’s trivial to implement.

There are other tricks that block logins except for those coming from known IP addresses, but that assumes you don’t move around much. This works from any computer, as long as you remember your super-top-secret login link page…

Easy server monitoring script

I manage or monitor a few servers, and it’s a good idea to keep an eye on how they’re holding up. The Linux `uptime` command is all I need – show me how long the server’s been up (or if it’s cycled recently – power hiccup?), and CPU load averages.

I just whipped up a dead-simple solution to let me embed the uptime reports from the servers into my retro homepage.

I’m quite sure there are better and/or more robust ways to do this, but this is what I came up with after maybe 2 minutes of thought.

On each of the servers, I added a shell script called “`uptimewriter.sh`” (in my `~/bin` directory, so located at `~/bin/uptimewriter.sh`). I made the file executable (`chmod +x ~/bin/uptimewriter.sh`) and used this script:

#!/bin/sh
echo “document.write(‘”`uptime`”‘);”

All it does is wrap the output of the `uptime` command in some javascript code to display the text when embedded on a web page. I then added it to the crontab on each of the servers, running every 15 minutes, and dumping the output into a file that will be visible via the webserver.

*/15 * * * * ~/bin/uptimewriter.sh > ~/public_html/uptime.js 2>&1

Every 15 minutes, the `uptimewriter.sh` script is run, and output into a javascript file that can be pulled to display on a web page.

Then, on my retro home page, I added code to run the javascript file:

When called from a web page, that will render the output of the `uptime` command, wrapped in a `document.write()` call as per the `uptimewriter.sh` script, displaying it nicely:

Screen shot 2010-10-29 at 11.51.32 AM.png

I can do some more work to style it a bit, so it wraps more nicely, but it’s a decent start.

stopping splogs – the nuclear option

I’ve been battling sploggers on UCalgaryBlogs continually. I just finished marking about 50 users/blogs as spam – that’s since yesterday afternoon. I could easily stop the problem outright by requiring people to use an @ucalgary.ca email address to create a site, but that goes against the possibility of anonymity, and many (most!) students don’t use their campus email addresses.

I currently run [Bad Behavior](http://www.bad-behavior.ioerror.us/), as well as [ReCaptcha](http://www.google.com/recaptcha). They stop the automated splog creation scripts, but there seem to be a LOT of people employed around the world to manually enter forms in order to get around captcha and anti-spam/splog techniques.

In looking through the WordPress.org forum on multisite (nee WPMU) issues, I found a new post called “[Splog Spammer Final Solution?](http://wordpress.org/support/topic/splog-spammer-final-solution)” It sounded a little like overkill, but when I thought about it, almost all splogs created on UCalgaryBlogs have come from a handful of countries. Countries where it’s not very likely that students and faculty will be creating new sites from. So I decided to try it out.

The forum post [links to a page containing lists of IP addresses and blocks](http://www.countryipblocks.net/networking/top-10-global-spammers-1q-2010/) belonging to countries where splog/spam activity is off the charts. All you do is copy some text, drop it into your .htaccess file, and hey presto. No more sites created from those countries.

Initially, I just banned all access from those countries. But that felt like a pretty slimy thing to do. So I stepped back and am now only blocking access to the site creation form wp-signup.php from those countries. If anyone affiliated with the university needs to blog while traveling the world, they’re free to do so, but they’ll need to have created the blog site from outside the Spam Zones. They should be able to access their sites, post content, etc… from anywhere.

I just tested the new splog-blocking technique, and it appears to be working. I’m really curious to see if it makes a dent on new splog creation.

The wp-signup.php script is [blocked](http://www.websitepulse.com/help/testtools.china-test.html) in Spam Zones:

Screen shot 2010-10-05 at 10.50.54 AM.png

But the rest of the service is available as usual:

Screen shot 2010-10-05 at 11.33.37 AM.png

The .htaccess file for UCalgaryBlogs now contains this at the bottom (after the WordPress stuff):

# block the fracking evil splog spammers

order allow,deny

(the contents of the various country block files go here)

#
allow from all

**Update:** Duh. Instead of trying to blacklist IP addresses and blocks of suspected spammers, it makes more sense to whitelist IP addresses and blocks that are likely to be used by valid users trying to create sites. I’ve modified the .htaccess file to deny access to wp-signup.php to everyone but those accessing from IP addresses that don’t smell suspicious…

Modifying the BuddyPress AdminBar

On UCalgaryBlogs, I’d modified the adminbar to include a link to the current site’s dashboard if a person was logged in, making it easy to get to the members-only side of WordPress without having to go through My Blogs and finding the right blog, then mousing over the pop-out “Dashboard” link. Most people never found that, and it’s not very intuitive.

So, I hacked in a hard-coded link to Dashboard in bp-core-adminbar.php. This worked, but meant I had to remember to re-hack the file after running a BuddyPress update. I forgot to do that right after I ran the last upgrade, and got emails from users asking WTF?

I decided to figure out the best way to add in the Dashboard link without hacking the actual plugin files. Turns out, it’s drop-dead simple. Yay, WordPress.

In your /wp-content/plugins/ directory, create a file called bp-custom.php (if it’s not there already), and drop this code into it:

<?php
  // custom functions for tweaking BuddyPress
  function custom_adminbar_dashboard_button() {
 	// adds a "Dashboard" link to the BuddyPress admin bar if a user is logged in.
 	if (is_user_logged_in()) {
 		echo '<li><a href="/wp-admin/">Dashboard</a></li>';
 	}
   }
  add_action('bp_adminbar_menus', 'custom_adminbar_dashboard_button', 1);
 ?>

When in place, your BuddyPress adminbar will look something like this:

BuddyPress-adminbar-modified

Yes, I know I should do something to properly detect user levels and privileges, rather than just providing the Dashboard link all willie-nillie to anyone that’s logged in, but the link itself just provides access to whatever Dashboard features the user is allowed to see, so there’s no security risk. Better to just say that a user can see the Dashboard for any site they’re logged into, and let WordPress deal with restricting access properly.

I should also deal with the possibility of WPMU being configured as a subdirectory vs. subdomain (the /wp-admin/ link will bork if you’re using subdirectories – better to use the real code to sniff out the base url of the current site…)